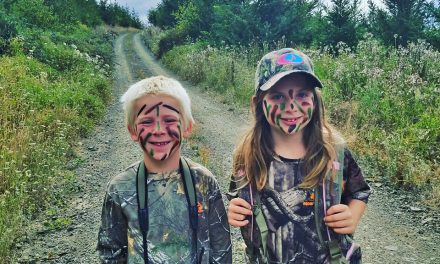
At the age of 14, I quickly gained an interest in photography, especially wildlife photography. I adored the idea of being able to capture moments and keep them forever. In just under two years of photographing animals, I have learned quite a bit and love to share my knowledge with others who also enjoy capturing images of critters in the wild.
Finding the Subject
There are many ways to succeed at finding the right subject to capture with your camera. If you’re a novice photographer, don’t worry—this is remarkably simple. If you don’t know what you’re looking to photograph, then you have many options.
For example, go for a hike in the woods and try to spot some different animals. You’ll probably see mainly birds, but that’s a great start. That will train your eye to spot animals that are not necessarily wanting to be seen. It’s extremely important to learn that skill.
On a recent trip, I visited a WWF nature reserve. At the time, I didn’t really know how to spot animals. I came across a red squirrel that I could easily have photographed, but by the time I realized where it was, it was too late. Now think about all the opportunities you could miss out on. This may allow you to spot animals, but where do you go to find them? Well, wildlife is all around you. You just need to pick a place and be patient. it could be your backyard, a forest, the beach, a nature reserve, or near a river. Some great places are far, and some are close to home.
Another way to approach this is to choose an animal you would like to photograph. Let’s say you want to capture an image of a kingfisher. Just search online for the best places near you to spot a kingfisher. You’ll most likely get a lot of search results. Just pick a place that looks good, go there, and remember to be patient.
Settings
Using the proper camera settings can make or break an image. You could see an animal you want to photograph, and in a split second, you could miss it because you weren’t prepared.
If you’re a complete beginner, I would recommend starting out on automatic. One example of an automatic setting is sports mode. It’s used primarily for shooting a subject in motion; however, you can also use it when your subject is stationary. This is because it allows you to take as many photos as you desire while staying in focus. It also means if the subject were to move, you’ll be prepared.
Next is close-up mode. In my opinion, the name is deceiving. Yes, it can be used to take some incredibly beautiful close-up shots, but I find it can be even more useful for something else. It blurs the background, which makes a more appealing shot or helps with removing something distracting in the background by driving the visual attention to the foreground.
If your photographic skills are more advanced, you can get a lot more technical by using the manual mode on your camera. If you want in-depth instructions on something specific, search online, but I’m going to give you some quick information here. You could go full manual, but I use aperture priority or shutter priority. That allows you to change how much light is let into the camera. You can change the aperture in F-stops. A small aperture like F/20 causes a longer exposure. This helps by blurring subjects that are moving. Shutter speed allows you to change how long the cameras shutter is open. If you want to freeze a fast-moving animal in an action shot, then this is the setting for you. The faster the shutter speed, the better. Faster than 1/500th of a second is ideal for freezing a subject. Obviously, this depends on the speed of the animal—the faster the critter, the higher the shutter speed should be. It can get very confusing extremely fast. Again, just be patient and experiment to get the hang of it.
 Storytelling
An interesting picture can tell a story to the viewer. I find the most important thing is emotion. The subject’s perceived emotion can completely change the direction of an image.
Including small details is also important. This can be anything from where the animal is located within the frame, how it is positioned, and even the environment around it. To put it simply, pay attention to the context of the whole photograph. Everything counts. Everything has an effect.
I would strongly suggest that you also plan carefully beforehand. Animals are unpredictable, so it’s important to have an idea of what you want to shoot before you embark on your photography session. Get a pen and paper. Write down some details about the animal you want to photograph, including the location and environment in which you’re hoping to photograph it in. Note whether you want a serious or playful shot. Then write down the emotions that link to your desired image. Then write down things that link to those emotions. This really helps you to think about what you are wanting to do.
Composition
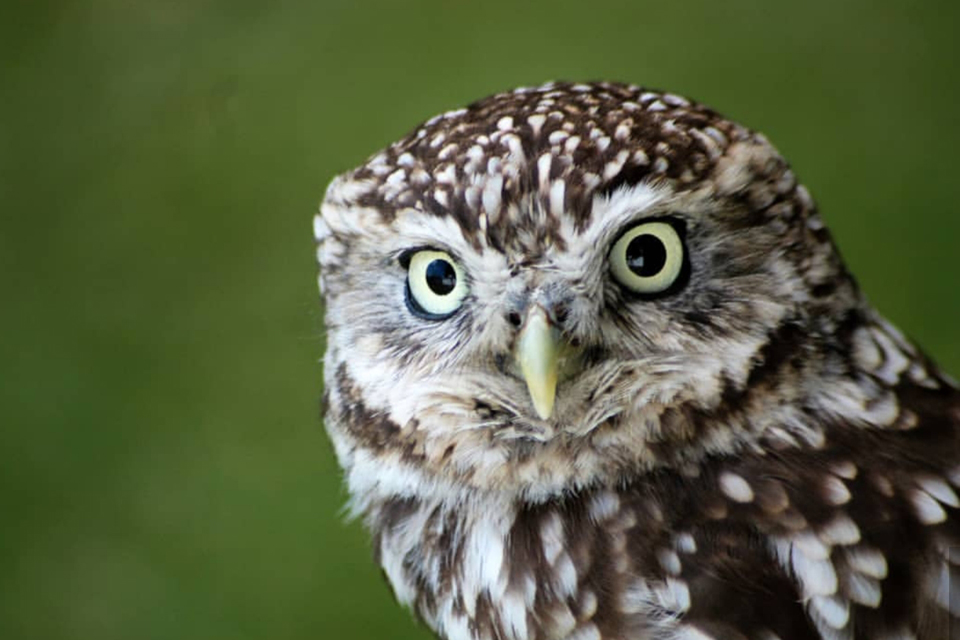
How many times have you been told that the rule of thirds is essential to good photography? This rule basically states that the main focus can be anywhere, but the center if you want it to be interesting. I agree that in most cases, this works—for example, the owl photograph you saw at the beginning of this article. The position of the owl is in the right portion of the photo, which makes it a pleasing image to look at.
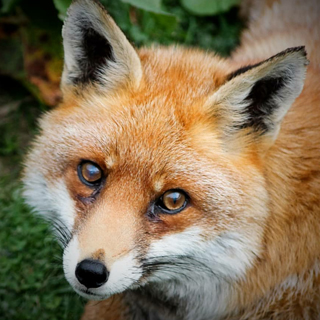
It may be a bit controversial to say this, but I believe rules are made to be broken. I strongly believe that, in some cases, the subject can be in the center and be appealing. Take my fox photo above as an example. It’s still appealing to look at, even though its centered. Therefore, don’t think too much about it. Just have fun with the shots you’re taking, and you’ll develop your own style over time.
I find the most important things in composition are the foreground, middle, and background. You can put the subject in any of these sections to make a good image—it’s what is in the other sections that will take your photo to another level. Let’s say you put the animal in the foreground. You then have too options—you can have a plain blurred background or have stuff layered in the middle and background. If the animal is in the background, then having something layered in the foreground can be quite useful. The best way to see what works is to simply try several options, so be creative and take loads of shots.
Eye Level
While learning photography, I realized quite early on that the eyes of the subject are extremely important. Not only do they help with telling a story, they also make the image much more engaging. Although it may not always be possible, try to take your photos from eye level. That will make a connection to the animal that would not have been possible otherwise.
~By Rebecca Pitt
Instagram
Rebecca Pitt never really had a interest in photography. In fact, she didn’t like photos that much at all. Then in art class, Rebecca’s teacher asked her to take some photos around the school and then use those images to inspire her drawings. Rebecca discovered that she really enjoyed taking those photos. On her 14th birthday, Rebecca received an inexpensive, secondhand Canon EOS 1100D camera as a birthday gift. Instead of using it to take photos for her art class, Rebecca instead fell in love with taking pictures of wildlife. She started an Instagram account to share her work and express her passion for the environment and wildlife. That account now has more than 8,000 followers. Now, at age 15, Rebecca’s wildlife photographs have been featured not only here in Wildlife Enthusiast Magazine, but in one other publication as well.


